

Upon logging in, your Dashboard will load automatically. Click on 'My Workspace' in the sidebar to access the All Projects page.
1. Navigation Sidebar (Left Panel)
Once you log in, the sidebar on the left provides access to the core areas of the tool:
Dashboard: Your primary overview.
My Workspace: Contains sub-folders to track project status:
All Projects
A comprehensive list of every project available in the database.
Pending
Projects that have been submitted and are currently awaiting review
Saved (Draft)
Projects you have started but not yet submitted; these are only visible to you.
Rework
Projects returned by Team Leads or the QC team due to missing, incorrect, or incomplete information.
My Briefcase
Your personal queue; this contains the projects you have "claimed" or are currently owning and working on.
Review
Projects that have missed their "Last Project Update" date. These are moved here automatically to be checked and updated.
Assigned
Projects specifically assigned to you by Team leads will be visible here.
Manage Tags
Allows you to create and manage custom tags. These are used to categorize sources and specific project stages while you are creating a project
Companies & Contacts: Access to the Companies and Contacts directories.
2. The Project Grid (Center Panel)
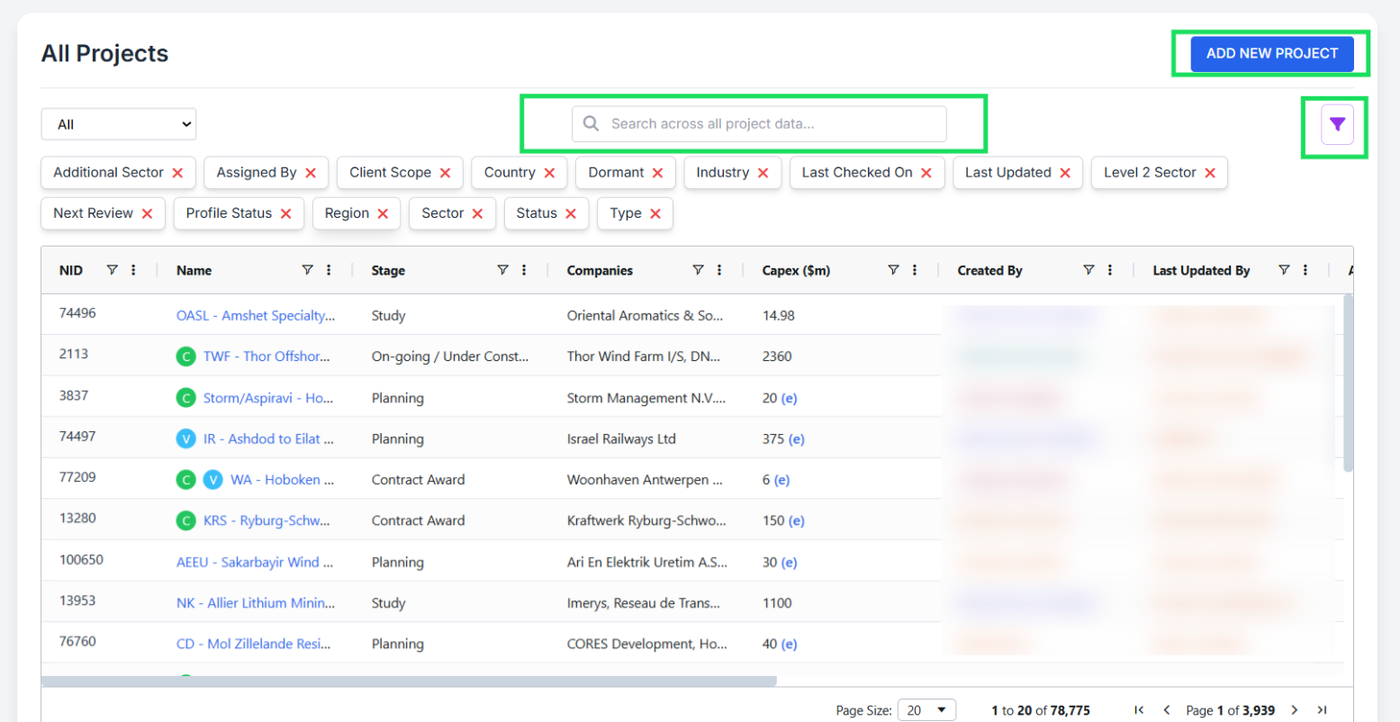
The central dashboard features a fully dynamic grid. It updates in real-time and does not require a "Submit" or "Save" button to show results.
Customizing the Data View
You can control exactly what data you see using the following interactive features:
Adding Columns: Click any tag above the grid (e.g., Industry, Country, Status) to instantly add it as a column in the table.
Removing Columns: Click the "X" on a tag above the grid, or drag a column header away from the grid and drop it back into the tag area.
Reordering Data: Click and drag a column header horizontally to change its position in the table.
3. Adding and Searching Projects
The top-right corner of the screen contains your primary action tools:
Add New Project: Click the + ADD NEW PROJECT button to create a new entry in the database.
Real-Time Search: Use the search bar to find projects by NID (Project ID) or Project Name.
Note: The grid uses "search-as-you-type" functionality. Results will filter immediately as you type.
Managing Filters: Located directly below the "Add New Project" button is the Filter Icon. From here, you can:
Save: Store your current filter configuration.
Reset: Clear all active filters to view the full list.
Delete: Remove previously saved filters.
